
How to Capture Micro Vehicle Damage in Photos and Video
This post will discuss some essential guidelines users can follow for capturing micro damage through photos/videos of a damaged vehicle.
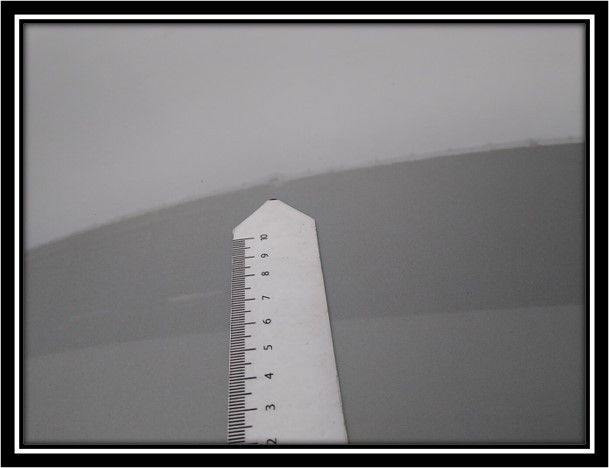
Micro vehicle damage capture is the process of photographing or filming very small dents, scratches, and paint defects in a way that makes them visible to both human reviewers and AI detection systems. Without the right camera distance, angle, and lighting, minor damage is invisible in photos and goes undetected.
This guide covers what micro damages are, why capturing them correctly matters for condition reports, and the five technical guidelines for producing inspection-ready photos and video. The content is relevant to anyone conducting a digital vehicle inspection: insurance adjusters, rental agents, fleet inspectors, and vehicle owners at lease-end or point of sale.
What We See in Automated Vehicle Inspections
In automated vehicle inspections, the smallest visible defects are often the easiest to miss during capture. Shallow dents, hairline scratches, and paint chips can disappear when the camera is too far away or the panel reflects the surrounding environment. These capture challenges are why distance, camera angle, lighting, and panel-level context matter when preparing inspection media for AI analysis.
What Are Micro Damages and Why Are They Hard to Capture?
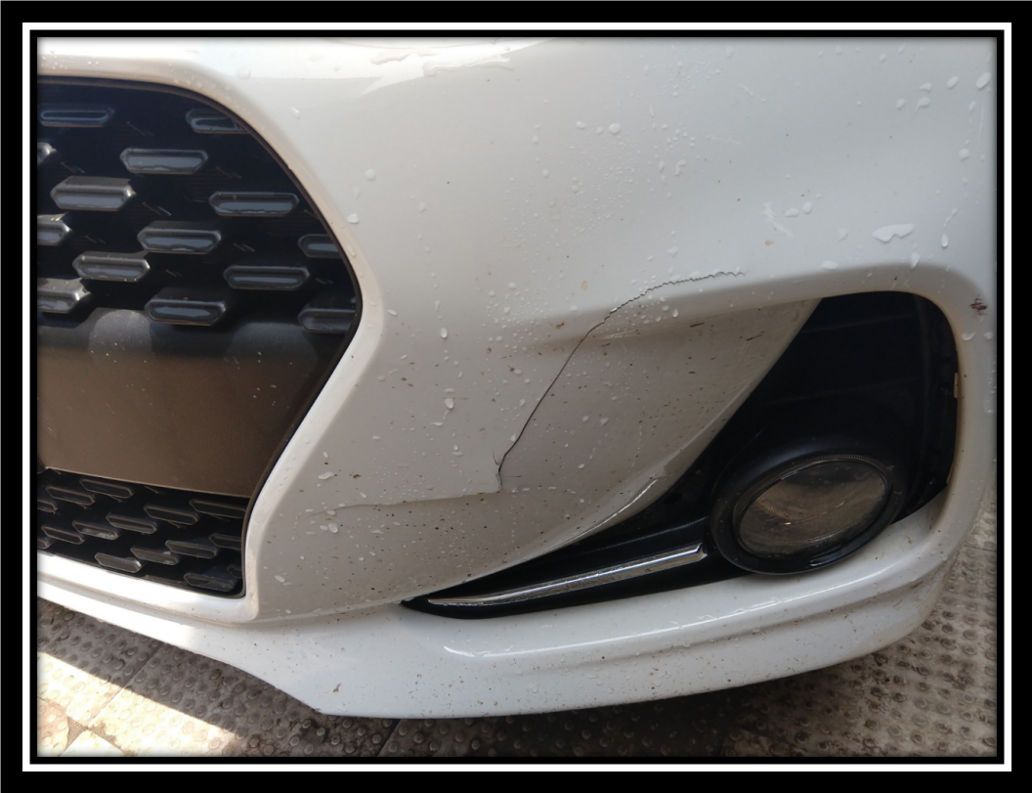
Micro damages include paint scratches, scraped bumpers, and dents that do not affect how a vehicle drives but do affect its value. These are the defects that matter most at lease return, vehicle handover, and used car sales, where condition determines pricing.
They are difficult to capture because of their size. A hairline scratch that is clearly visible in person may disappear completely in a standard-distance photo. A shallow dent that shows in the right light at the right angle becomes invisible when the light source shifts. A paint chip that looks obvious at close range gets lost in a whole-vehicle shot.
Because of their small size, micro damages can also be hidden in plain sight if the capture angle is slightly wrong. Damage on the surface of a curved panel may only be visible from a narrow range of viewing angles. Outside that range, the panel appears undamaged. The challenge is not that the damage is hidden. It is that the photo has to be taken in a way that reveals what the eye can see but the camera tends to miss.
Why Do Vehicle Condition Report Images Matter?
Vehicle condition report images provide visual evidence of a vehicle's condition at a specific point in time. Clear panel-level and close-up images help inspectors, insurers, rental companies, and vehicle owners verify existing damage and compare the vehicle's condition during handover, return, resale, or claims.
For micro damage, image quality matters even more. A scratch or shallow dent that is visible in person can disappear when the camera is too far away, the panel is poorly lit, or the viewing angle is incorrect.
The accuracy of a vehicle condition report depends on the quality of the media it is based on. If the photos miss micro-level damage, the condition report does too. That omission creates problems downstream.
At lease return, undocumented damage becomes a source of disputed charges. If the leasing company identifies micro damage at return that was not recorded in the inception inspection, neither party has a reliable reference to resolve the disagreement. Independent documentation of the vehicle's condition before return is the most practical protection against unfair charges. Independent repairs for identified damage often cost 30 to 50% less than charges applied by the dealer or leasing company after return, making early capture directly cost-effective.
For resale, missing micro damage in the listing photos means the vehicle is under-graded by the seller and over-represented to the buyer. Disputes arise after the transaction. The reputational and financial cost of a post-sale dispute is typically higher than the cost of the underlying damage.
For insurance claims, condition report images that do not capture the full extent of visible damage produce inaccurate estimates. A scratch that stops at the clear coat has a different repair cost than one that has reached the base coat or primer. Capturing that distinction accurately in photos affects the claim amount and avoids disputes at settlement.
The vehicle condition report is only as reliable as the photos and videos it was built from. Capturing micro damage correctly is what makes the report usable.
The One Rule Behind Every Digital Vehicle Inspection
AI-based damage detection can detect only the damage that is visible in the submitted photos and video. A traditional human inspector also faces this limitation in practice, but has the advantage of viewing the vehicle in person and revisiting any area they initially overlooked. For a complete and consistent digital vehicle inspection, the submitted media must cover the full vehicle and capture damage clearly enough for the AI to identify it. For more detail on the capture principles that apply across all inspection types, see AI inspection photo and video capture.
How Do You Capture Micro Damage Specifically?
The following five guidelines cover the specific variables that determine whether micro damage is visible and detectable in inspection photos and video.
Guideline 1: Camera Type
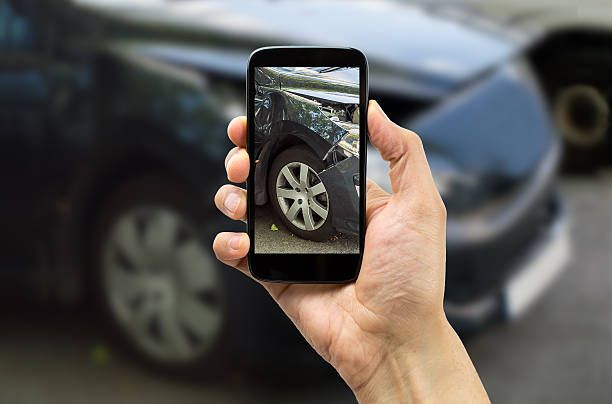
A modern smartphone camera is generally sufficient for vehicle inspection capture when it produces clear, well-focused images. For micro damage, use the highest practical resolution available and avoid digital zoom, compression, or images that become blurry when viewed closely.
If your camera meets this minimum, it can capture visible damage. Naturally, a better camera captures more detail. Where possible, use the highest-resolution camera available.
For micro damage specifically, camera resolution matters more than it does for standard inspections. A hairline scratch at low resolution may not produce enough pixel detail for accurate classification. If micro damage is the primary focus of the inspection, use the highest-resolution mode available on the device.
Photo & Video Capture
Capture every micro damage with AI-guided photo and video capture
Help users capture clear, inspection-ready evidence with real-time guidance that improves damage detection accuracy.
Guideline 2: Location
The vehicle's location determines the available light and the space to move around it. For micro damage capture, both factors are critical.
You need enough space to walk a full circuit around the vehicle, including stepping back for whole-panel shots and moving close for zoomed-in captures. A confined space makes this physically difficult and produces media from awkward angles.
In terms of indoor versus outdoor, both settings work, provided the lighting and background conditions in Guideline 4 are met. Using a structured 360-degree video inspection solution provides complete visual coverage of the vehicle, making it easier for the AI to analyse the full condition consistently.
Guideline 3: Car Type
Different vehicle types present different capture challenges, and micro damage on some vehicles is inherently harder to photograph than on others.
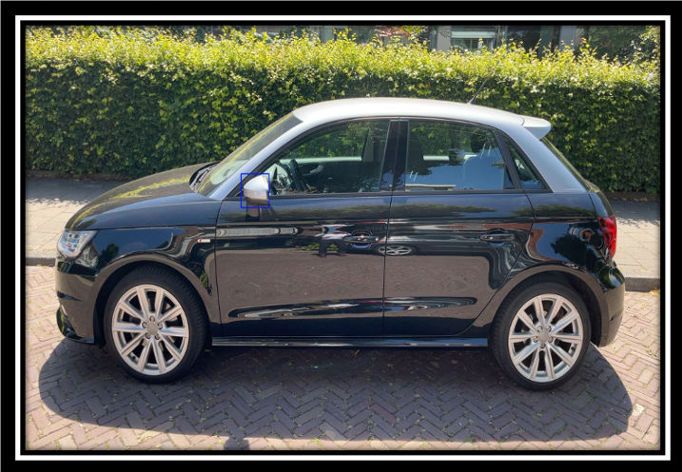
Dark metallic-colored cars are the most common challenge. The combination of dark paint and metallic finish creates surfaces that absorb and reflect light in ways that make minor surface variations difficult to distinguish. Minor dents and scratches that would be clearly visible on a lighter vehicle may appear flat in a photo of a dark metallic car.
If your vehicle falls into this category, the lighting and framing guidelines below become more important, not less. Specific techniques for revealing damage on dark metallic surfaces are covered in the Framing and Views guideline.
Guideline 4: Lighting and Background Conditions
Lighting is the most critical variable in micro damage capture. The difference between a useful photo and an unusable one is often lighting alone. The following conditions produce consistently poor results.
Reflections or glare from the background: Car body panels are highly reflective, and strong reflections from surrounding objects or the environment make it extremely difficult to see surface-level damage. When the panel acts as a mirror, the camera captures the reflection, not the damage beneath it.
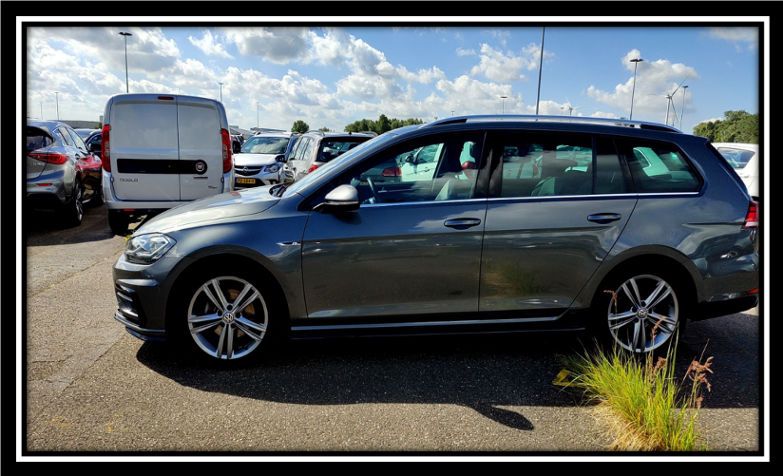
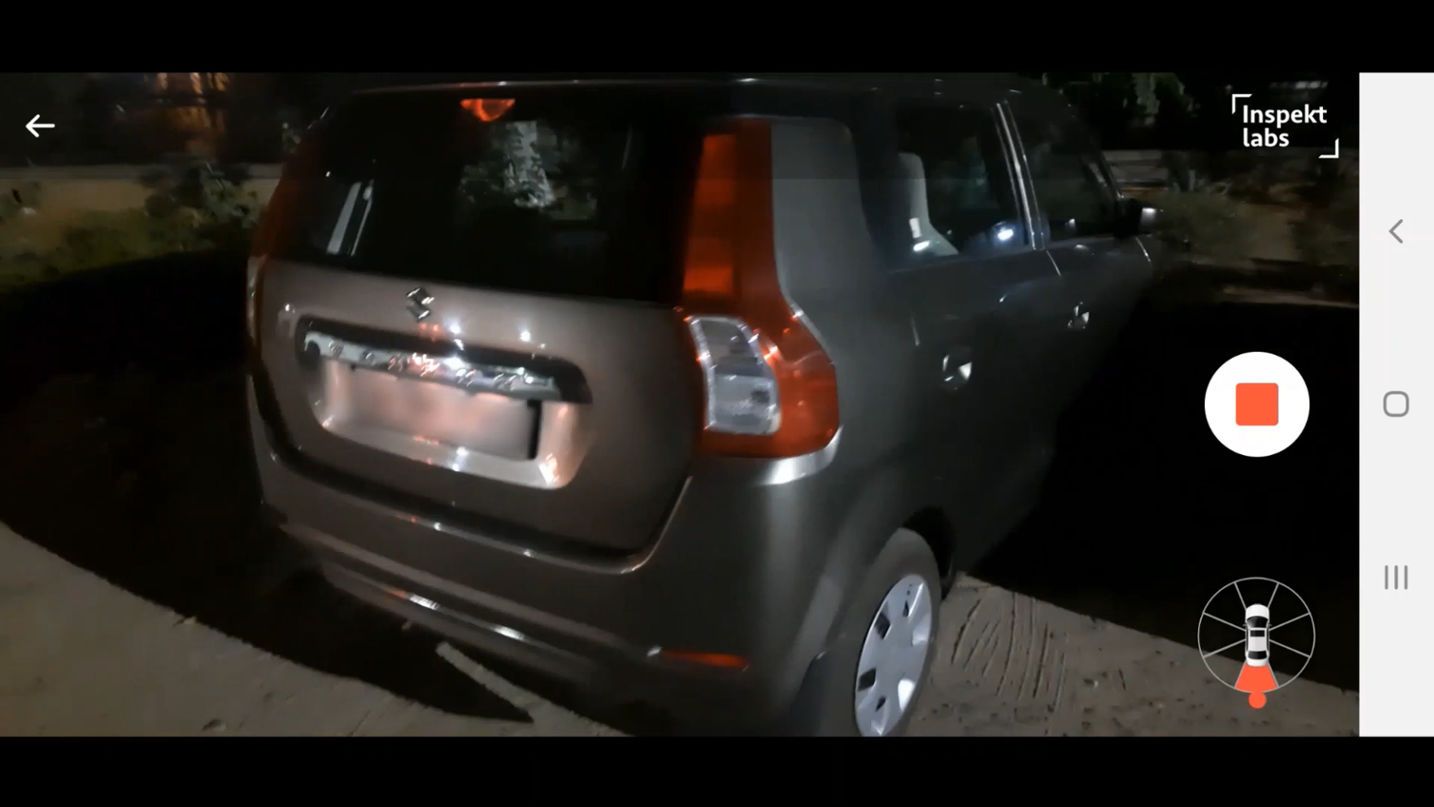
Low light conditions: Low light makes the entire vehicle surface less defined. For micro damage, which may only create a subtle variation in the surface, inadequate light removes all contrast that would otherwise make it detectable. The effect is worse on dark-colored vehicles.
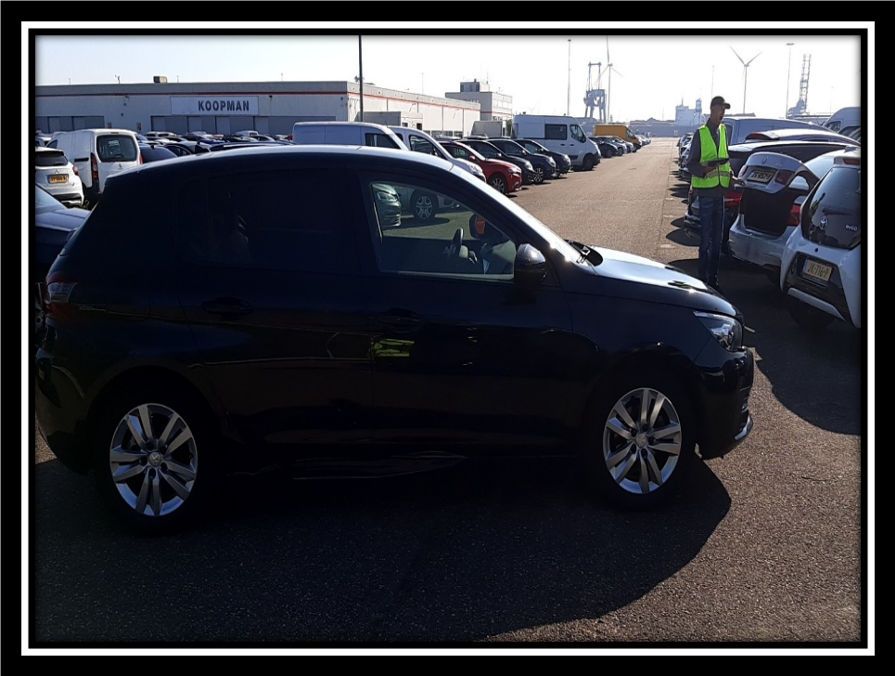
Strong light source behind the vehicle: When a bright light source, such as direct sunlight, is directly behind the car, the side facing the camera is underexposed. The vehicle is dark in the photo despite being in sunlight. Micro damage on the underexposed side will not be visible.
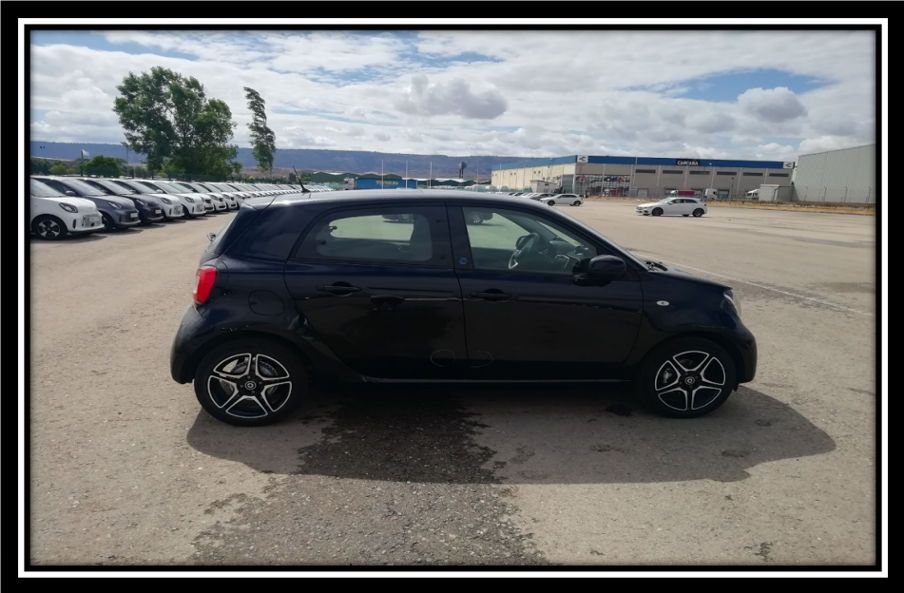
Fixed cameras and light diffusers for controlled environments: In some settings, capturing a vehicle without infrastructure support is not practical. Body shops and high-volume inspection points can adapt fixed camera setups with light diffusers to control lighting conditions precisely. This approach produces consistently accurate captures because the lighting environment is stable for every inspection.
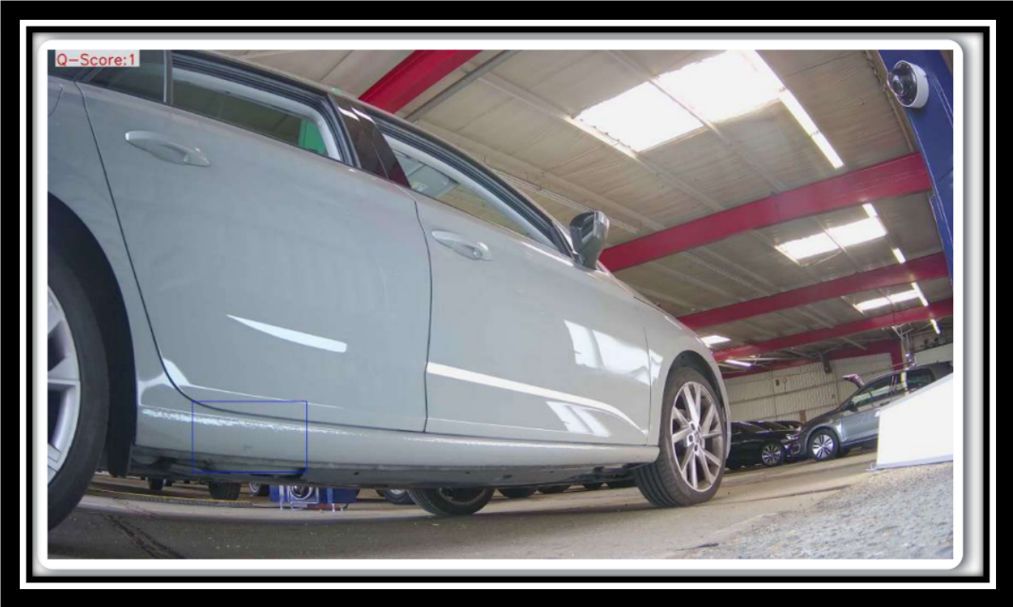

Guideline 5: Framing and Views for the Damage
How you set up the frame before capturing is the factor you have the most direct control over. The following techniques determine whether the damage is visible in the resulting media.
Establishing shot from approximately 7 feet: Before zooming in on damage, take one shot from approximately 7 feet (around 2 metres) away to capture the damage in the context of the full panel. This frame establishes exactly where on the vehicle the close-up damage is located. Without this context shot, a zoomed-in photo of a scratch does not tell the AI or a human reviewer which panel it is on.

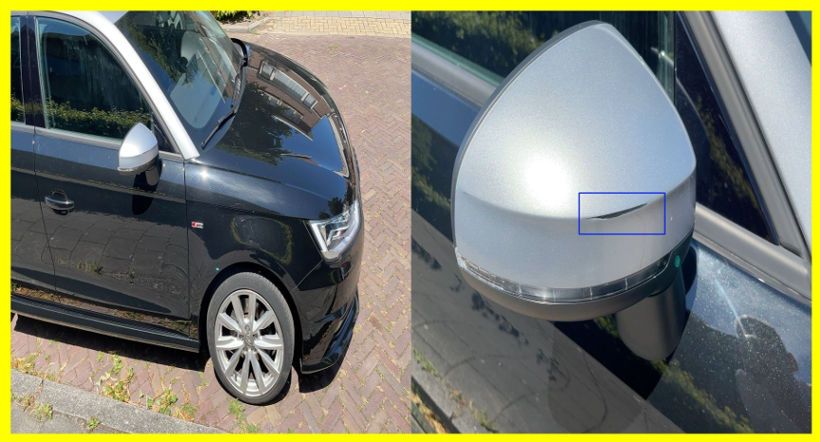
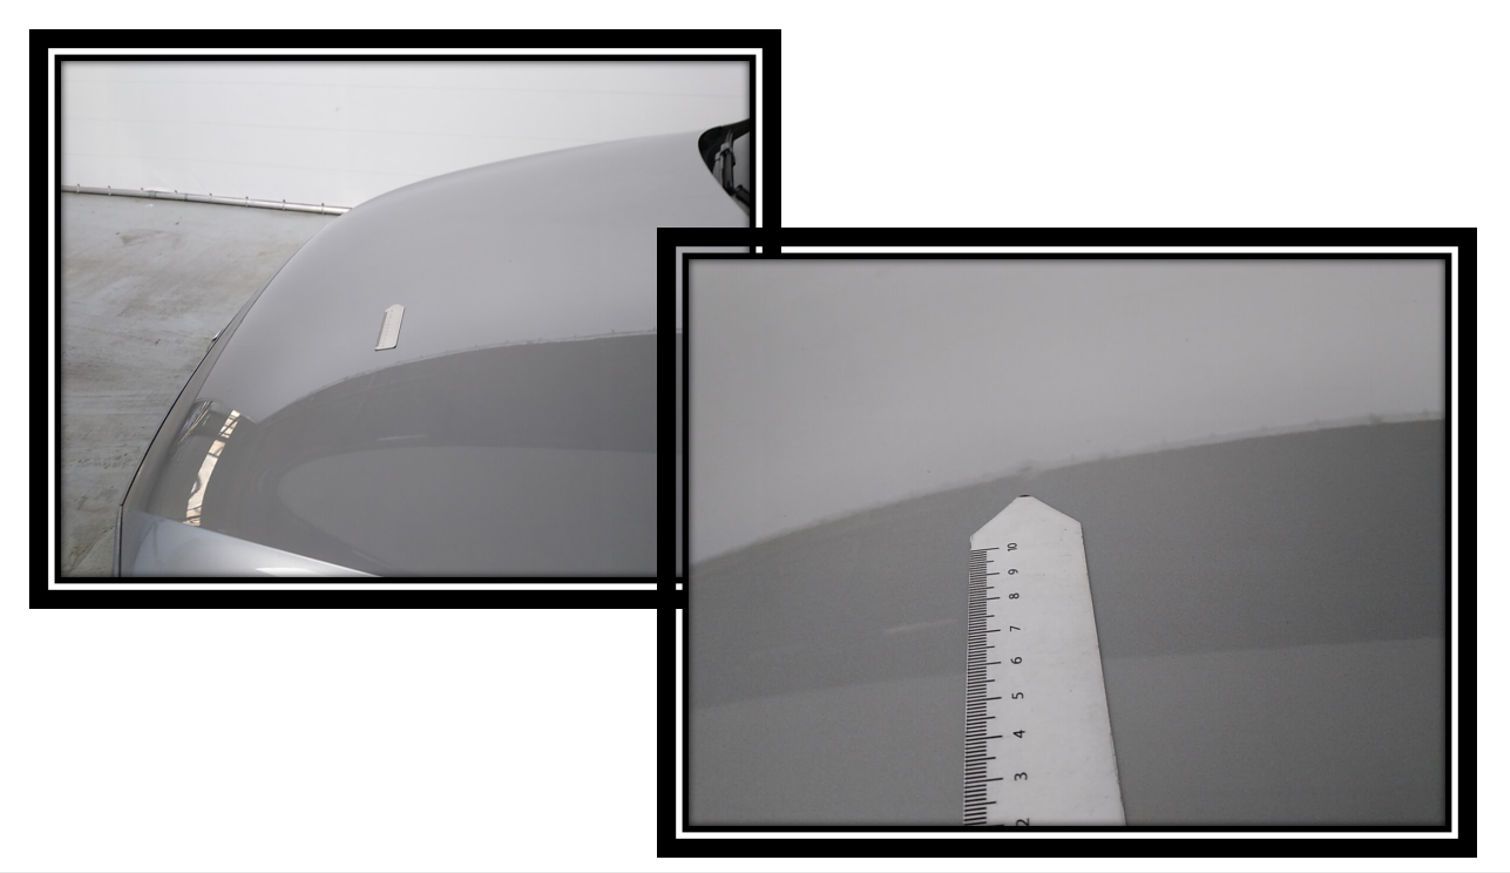
Zoom-in and zoom-out distances: For micro damage, capture both a zoomed-out view at 100 to 150 centimetres to provide panel context, and a zoomed-in view at 15 to 20 centimetres to reveal the damage detail. The zoomed-out view alone will miss micro damage. The zoomed-in view alone loses the spatial context needed for accurate classification.
The example below shows why the zoom-in view is essential for small dents. The damage is undetectable in the zoomed-out shot and clearly visible in the zoomed-in shot.
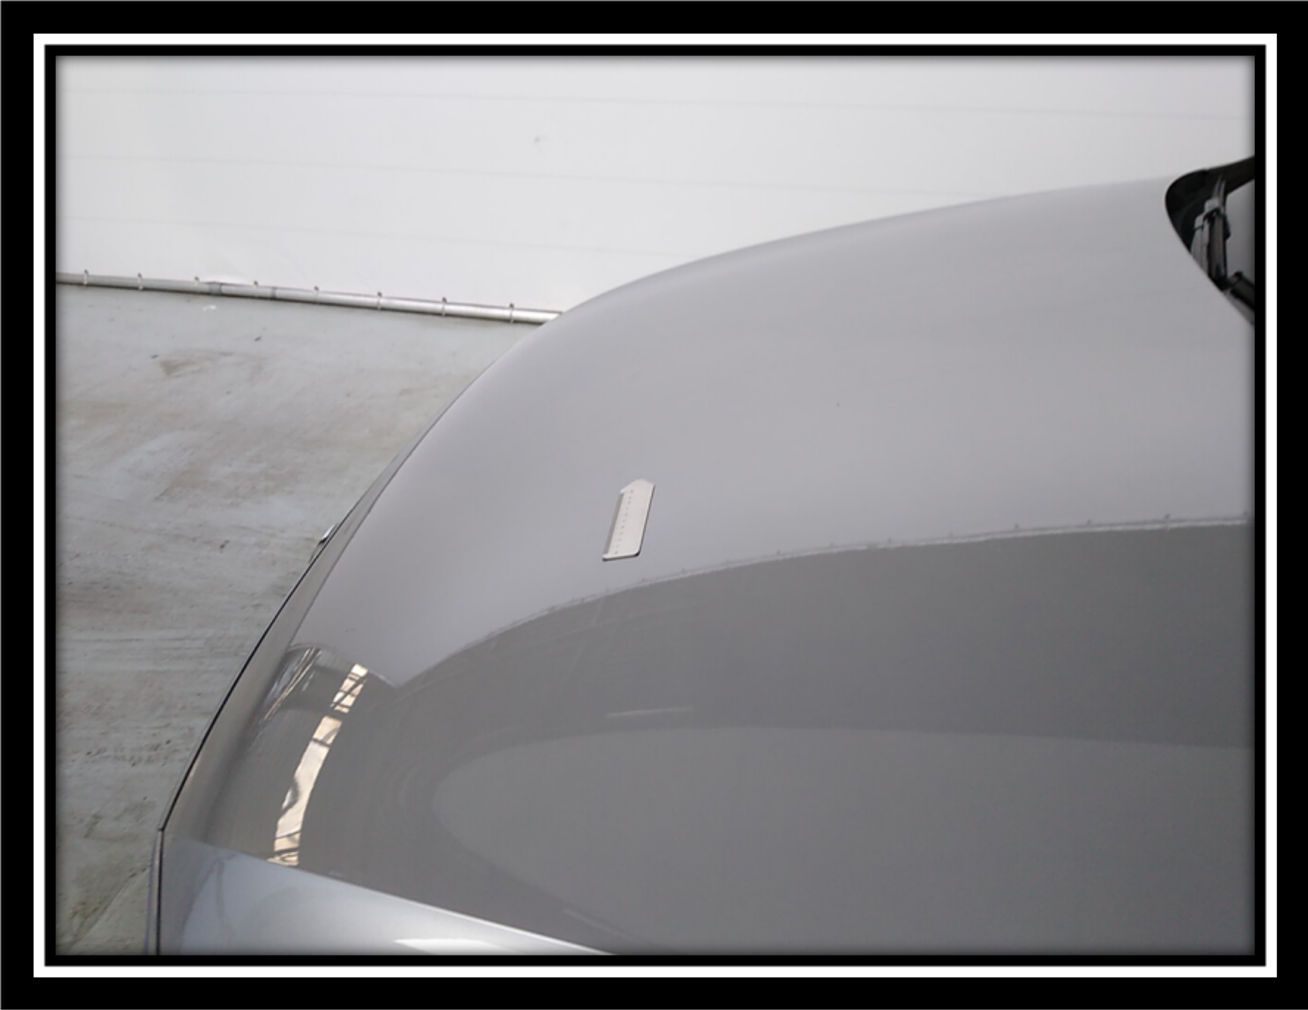
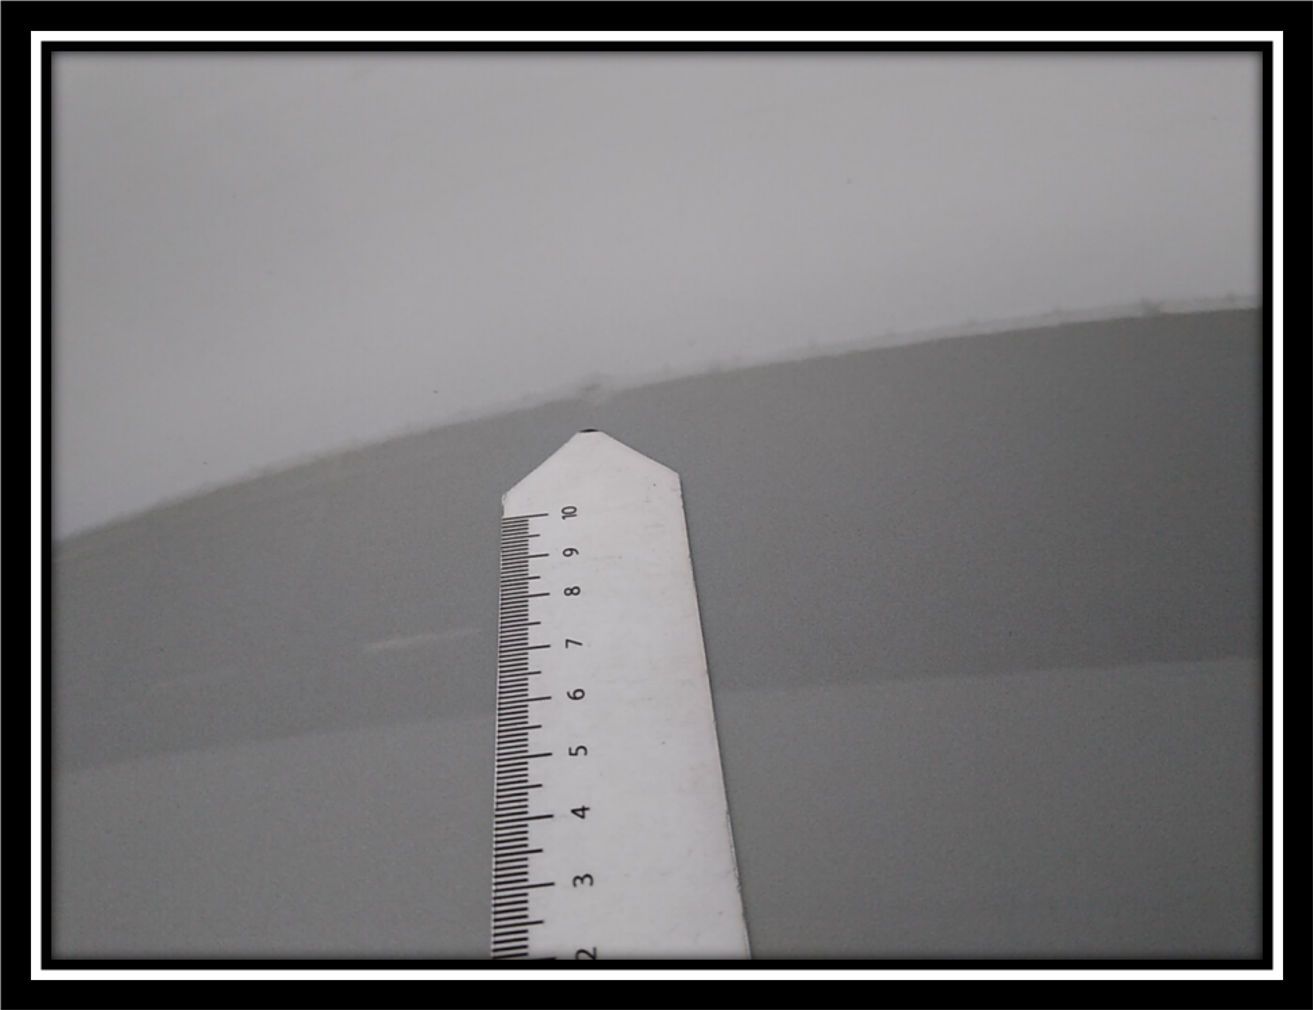
Angle for small dents (30 to 60 degrees): For small dents, approach at 30 to 60 degrees from the damage surface rather than at 90 degrees (straight on). A straight-on photo of a shallow dent produces an image that shows the smooth surface, with the dent too subtle to distinguish. At 30 to 60 degrees, the depth of the dent becomes more apparent because the viewing angle creates a shadow or visual break in the panel surface. Use the background reflection to enhance visibility: when a reflective surface shows a distorted reflection in the damaged area, that distortion is the damage. Frame the shot to capture it.
Example: A shallow dent photographed straight on may look like a normal reflection. When the camera moves to the side and captures the panel at an angle, the reflection bends around the dent, making the deformation easier to identify.
Reference object for scale: For very small damage, place a coin or similarly-sized reference object of known dimensions adjacent to the damage before photographing. A coin in the frame gives the AI and human reviewer a dimensional reference, providing a visual scale that helps reviewers estimate the approximate size of the damage. This technique is widely used in forensic and damage documentation photography when physical measurement is not practical.
Camera height at the damage level: Set the camera at the same height as the damage, not from above or below. Shooting down onto a scratch on a door panel shows the top of the surface, which may not reveal the damage at all. At eye level with the damage, the surface angle produces the contrast needed to show the defect.
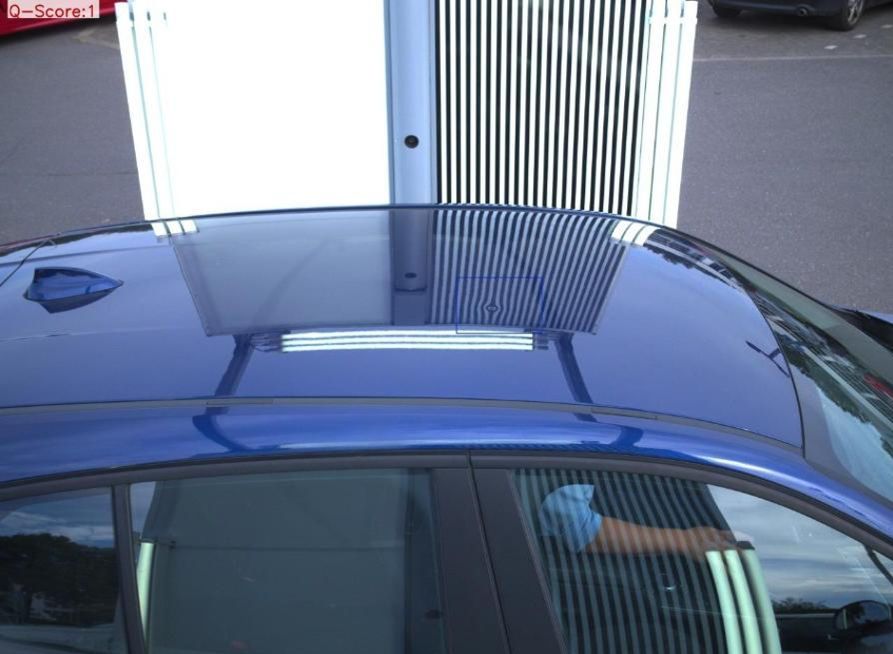
Zebra reflectors: In some situations, zebra reflectors, either fixed or portable, help highlight minute dents by creating a structured reflection pattern across the panel surface. A dent or depression in the panel causes the parallel lines of the reflection to curve or break at the point of deformation. The damage becomes visible through the distortion in the pattern.
For the complete set of capture principles covering all inspection types and video capture, see the full vehicle capture guidelines.
Common Mistakes That Hide Micro Damage in Photos
The following mistakes are specific to micro damage capture. They differ from general capture mistakes because the small size of the damage makes each one more consequential.
- Shooting only from a distance: A whole-vehicle photo provides context but misses micro damage entirely. Close-up captures are essential for damage under a few centimetres.
- Shooting at 90 degrees straight-on to a dent: Shallow dents are nearly invisible from directly in front. The 30 to 60-degree angle is what reveals them.
- Backlighting the vehicle: A bright sky or light source behind the car leaves the panel facing the camera underexposed. Micro damage on the underexposed side becomes invisible.
- Allowing glare from surrounding objects: Glare on a reflective panel surface floods the image with reflected light, hiding the damage beneath. Changing the camera position or diffusing the light source resolves this.
- Using low resolution or digital zoom: Digital zoom reduces effective resolution. On a device with optical zoom, use optical zoom only. On a device without it, move physically closer rather than zooming digitally.
- Skipping the establishing shot: Without a panel-level context shot, the AI cannot reliably locate where on the vehicle the close-up damage is.
Quick Do’s and Don’ts for Capturing Micro Damage
Checklist: Capturing Report-Ready Micro Damage Photos
- Zebra reflectors or fixed camera setup considered for very fine dents in controlled environments.
- Extra care for dark metallic vehicles: adjust angle to use surface reflection to reveal damage.
- Reference object (coin or similar) next to the damage for scale.
- Camera at the same height as the damage.
- Angle at 30 to 60 degrees from surface for small dents.
- Zoomed-in view at 15 to 20 cm for damage detail.
- Zoomed-out view at 100 to 150 cm for damage location reference.
- Establishing shot from approximately 7 feet for panel-level context.
- No glare or strong reflections on the panel being photographed.
- No strong light source directly behind the vehicle.
- Vehicle positioned in open space with enough room to walk a full circuit.
- Camera resolution above 500x500 pixels minimum. Higher resolution for very fine damage.
Key Takeaways
- Micro damages are paint scratches, shallow dents, and surface defects that affect vehicle valuation at lease return, resale, and inspection.
- AI-based damage detection depends on the quality and visibility of the submitted media.
- The five critical variables are: camera resolution, vehicle location, car type (dark metallic vehicles need extra care), lighting conditions, and framing and angles.
- For small dents, photograph at 30 to 60 degrees from the surface rather than straight on. This angle reveals the depth that a straight-on shot hides.
- Zoom-in (15 to 20 cm) combined with a context shot from approximately 7 feet gives the AI both the detail and the location needed for accurate classification.
- A reference object placed next to the damage provides scale reference for the AI and human reviewer when physical measurement is not available.
The quality of a vehicle condition report depends on the quality of the photos and video it is based on. Micro damage that is clearly visible in person can disappear entirely in a photo taken from the wrong distance, at the wrong angle, or in the wrong light.
The five guidelines in this article provide a specific, practical framework for capturing micro-level vehicle damage in a way that AI inspection systems can reliably detect and classify. Camera type, location, vehicle type, lighting conditions, and framing are all controllable variables. Applying these guidelines consistently produces inspection media that supports accurate condition reports, cleaner resale and lease-return processes, and fewer disputed charges.
For guided capture that applies these principles automatically through a prompted inspection flow, see Inspektlabs' photo and video capture platform.
Frequently Asked Questions
How do you capture micro damage on a car?
Photograph the damage at 15 to 20 centimetres for close-up detail, and at 100 to 150 centimetres for panel context. Use a 30 to 60-degree angle for small dents rather than a straight-on shot. Make sure the lighting source is in front of, or to the side of, the vehicle, not behind it.
Why is car damage not visible in my photos?
The most common causes are shooting from too far away, photographing at a 90-degree angle to a shallow dent, or having strong backlight behind the vehicle. Moving closer, adjusting the angle to 30 to 60 degrees from the damage surface, and repositioning to avoid the backlight resolves most visibility problems.
What is the best way to photograph a vehicle for condition reports?
Start with an establishing shot from approximately 7 feet to capture the damage in the context of the panel. Then take a zoomed-in shot at 15 to 20 centimetres from the specific damage. Use adequate diffused lighting, no strong backlight, and photograph at camera height equal to the damage level.
How do I take pictures of car damage for insurance?
Document the full vehicle with an overview shot, then capture close-up photos of every area with visible damage. For small dents, photograph at 30 to 60 degrees to the surface. Place a coin or reference object next to the damage to provide scale. Ensure no strong backlight or glare obscures the surface.
What documentation is needed when photographing a rental car's condition?
Document the full vehicle condition at pickup with both panel-level and close-up shots of any existing damage. Repeat the same coverage at return. Timestamped photos of the vehicle's condition at both handover points give both the rental company and the renter a verifiable reference for any dispute about new damage.
Can AI detect very small dents and scratches from photos?
Yes, AI-based damage detection performs best when the damage is clearly visible, well framed, and captured under suitable lighting. Poor-quality or ambiguous images can reduce the system's ability to identify and classify small defects accurately.
What is the best tool for capturing inspection-ready vehicle photos?
A guided capture platform that prompts the user through required angles, validates image quality before submission, and rejects substandard media before the AI assessment runs. Inspektlabs provides guided capture with real-time quality feedback, ensuring the submitted media meets the standard needed for accurate micro damage detection.
What camera angle is best for photographing a small dent?
A 30–60-degree angle can make shallow dents easier to see than a straight-on view. The angled view can reveal changes in the panel's reflection and make subtle surface deformation more visible.