Pre-Trip Inspection Checklist for Fleet (Free PDF)
A worn tire, a dead brake light or a cracked windshield is easy to fix in the yard and expensive to discover on the road. A pre-trip inspection checklist gives drivers a repeatable process for catching these issues before departure while giving fleet managers a record of what was checked, what failed and what happened next.
For fleet managers, a standardized inspection process makes it easier to track defects across vehicles, drivers and locations, and follow up before a minor issue turns into a breakdown, safety concern or unexpected repair.
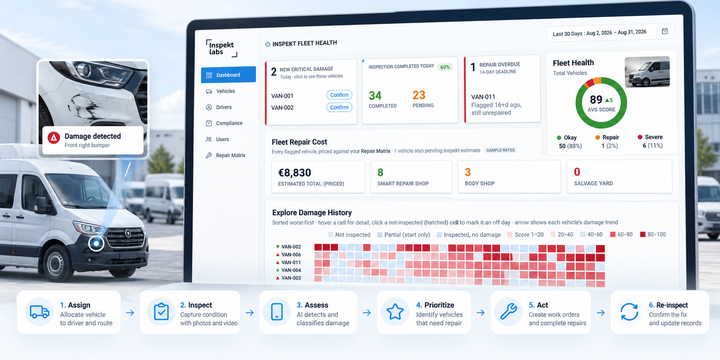
This guide includes a free pre-trip inspection checklist PDF that gives fleet teams a way to standardize daily checks, along with a simple format for drivers to document vehicle condition before every trip. For teams looking to make inspections faster and more consistent, fleet inspection software can identify visible damage from photos or video, record vehicle condition, and generate structured inspection reports.
Free Pre-Trip Inspection Checklist PDF
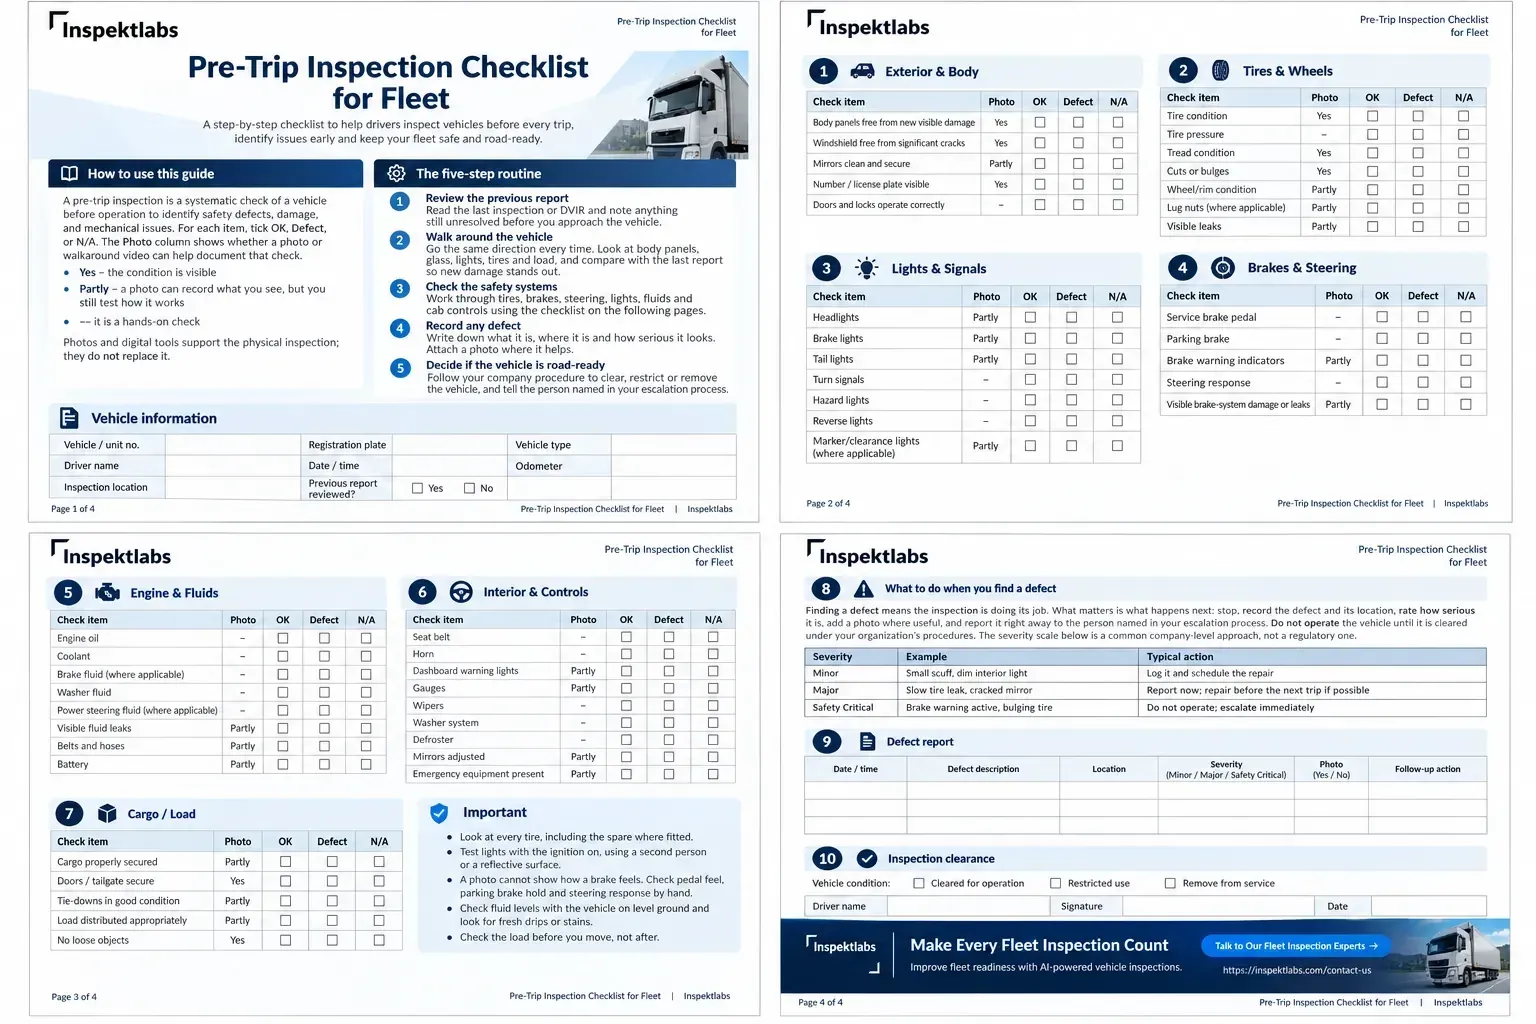
Download the printable fleet pre-trip inspection checklist and use it to standardize daily vehicle checks across your fleet.
Note: This pre-trip inspection form/checklist covers the common points to check before a trip. Fleet teams can add vehicle-specific items where needed.
Quick Answer: What Is a Pre-Trip Inspection?
A pre-trip inspection is a systematic check of a vehicle before operation to identify safety defects, damage, and mechanical issues. The driver walks the vehicle, checks the components that affect safe operation, and decides whether it is fit to go. It happens before each trip or shift, and it works best when findings are recorded and followed up.
What Is a Pre-Trip Inspection Checklist?
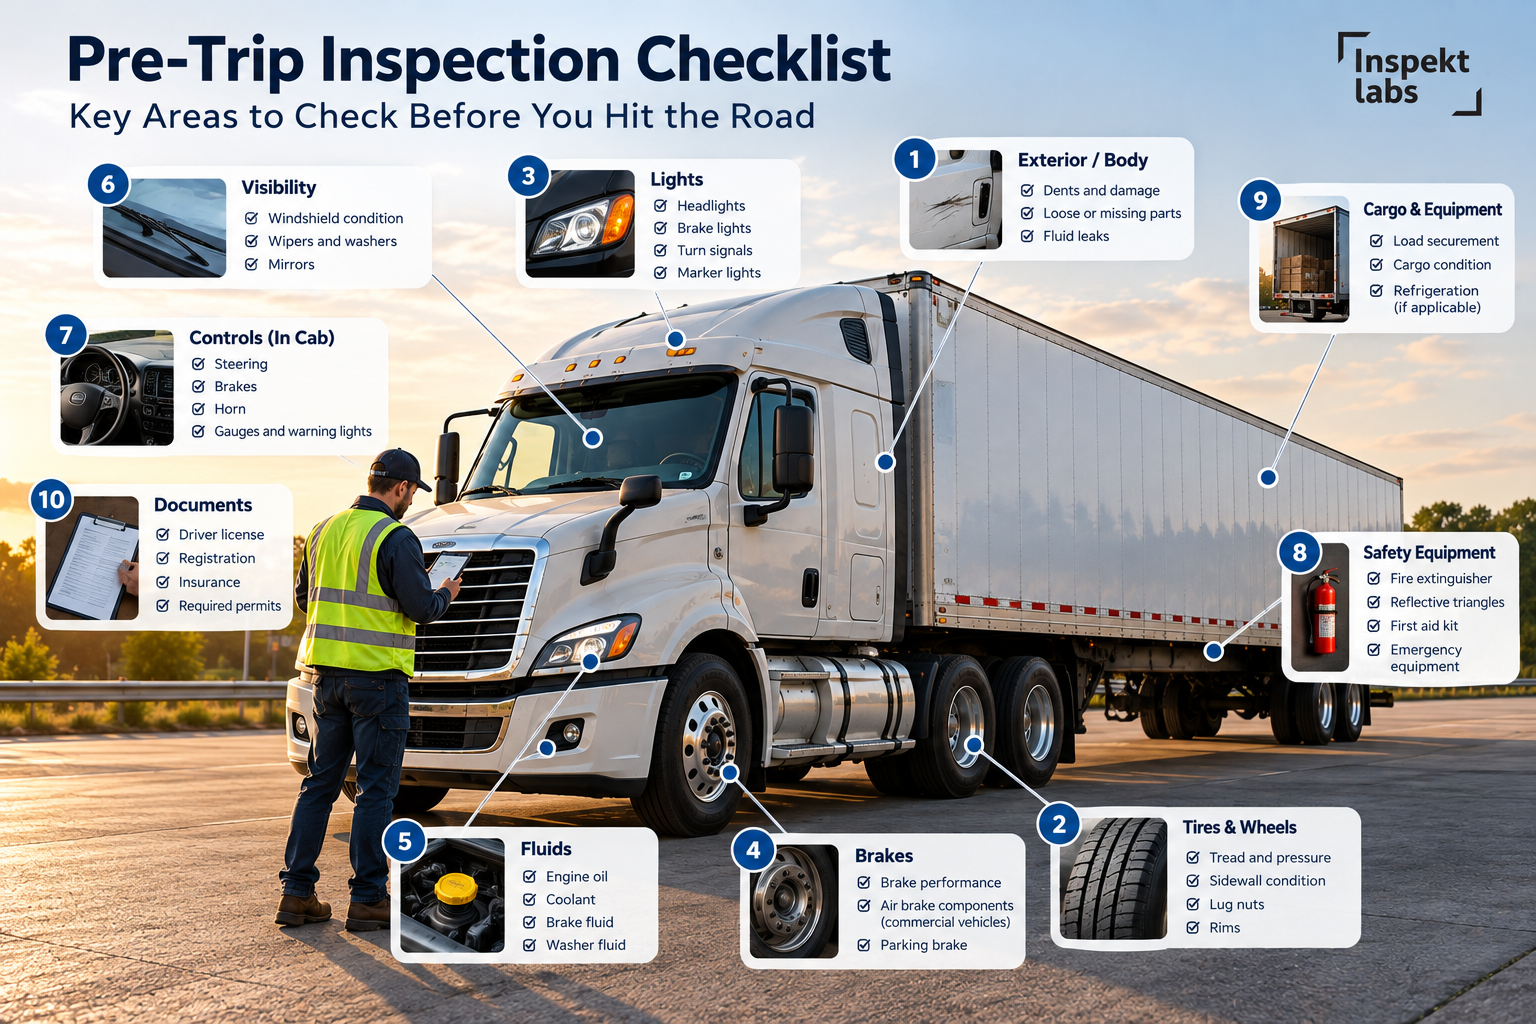
A pre-trip inspection checklist is a structured list that guides a driver through those checks in a fixed order, so nothing depends on memory or habit. It also goes by other names: pre-trip inspection form, daily vehicle inspection checklist, or fleet vehicle inspection checklist. For regulated commercial vehicles, teams often call it a DOT pre-trip inspection checklist.
One list rarely fits every vehicle. A sedan, a cargo van, and a tractor-trailer share the basics (tires, lights, brakes, fluids), but the inspection gets more specific as the vehicle gets larger or more specialized. For example, a tractor-trailer needs checks for air brake components, fifth-wheel connections, and trailer coupling that would not apply to a passenger vehicle.
A fleet that uses refrigerated trucks might have checks on its refrigeration equipment, for example, while tankers or other specialty vehicles will have their own inspection sites.
Pre-Trip Inspection Checklist at a Glance
A pre-trip check involves more than a visual walkaround. Drivers still check critical safety and mechanical components. AI-enabled inspection technology can capture or assess some of the visible problems.
AI can support the visual and documentation side of a pre-trip inspection, but it does not replace hands-on checks. Brakes, steering, fluid levels and other mechanical components still require physical inspection and driver judgment.
Why Pre-Trip Inspections Matter for Fleet Operations

A pre-trip inspection gives fleet teams a consistent way to check vehicle condition before a trip and identify issues that may need attention before the vehicle leaves the yard. For fleet managers, the inspection record also provides a way to track recurring defects, identify maintenance needs and understand where problems are showing up across the fleet.
The 2026 CVSA International Roadcheck results show why these checks matter. Inspectors conducted 54,575 inspections across the U.S., Canada and Mexico, and about 19% of vehicles were placed out of service. Among vehicle out-of-service violations, brake systems, tires, defective brakes, lights and cargo securement were the five most common categories.
For fleet managers, the value of a pre-trip inspection goes beyond identifying a single defect. When inspection results are recorded consistently, managers can track recurring issues by vehicle, location or inspection date and use that information to prioritize maintenance.
Brake-related categories together made up 39.1% of vehicle out-of-service violations. Tires, lights, and cargo securement are all visible in a careful walkaround, which is exactly what a pre-trip inspection is for. Roadcheck covers commercial vehicles in the US, Canada, and Mexico, but the pattern applies to any fleet: the defects that take a vehicle off the road are usually present before it leaves the yard.
Pre-trip inspections are useful across mixed fleets, not just heavy trucks. A slow tire leak on a van, a cracked mirror on a service vehicle, or a failed brake light can all lead to safety issues, downtime or an avoidable repair later. For mixed fleets, one shared routine, adapted by vehicle type, is easier to train and audit.
What Should Be Included in a Fleet Pre-Trip Inspection Checklist?
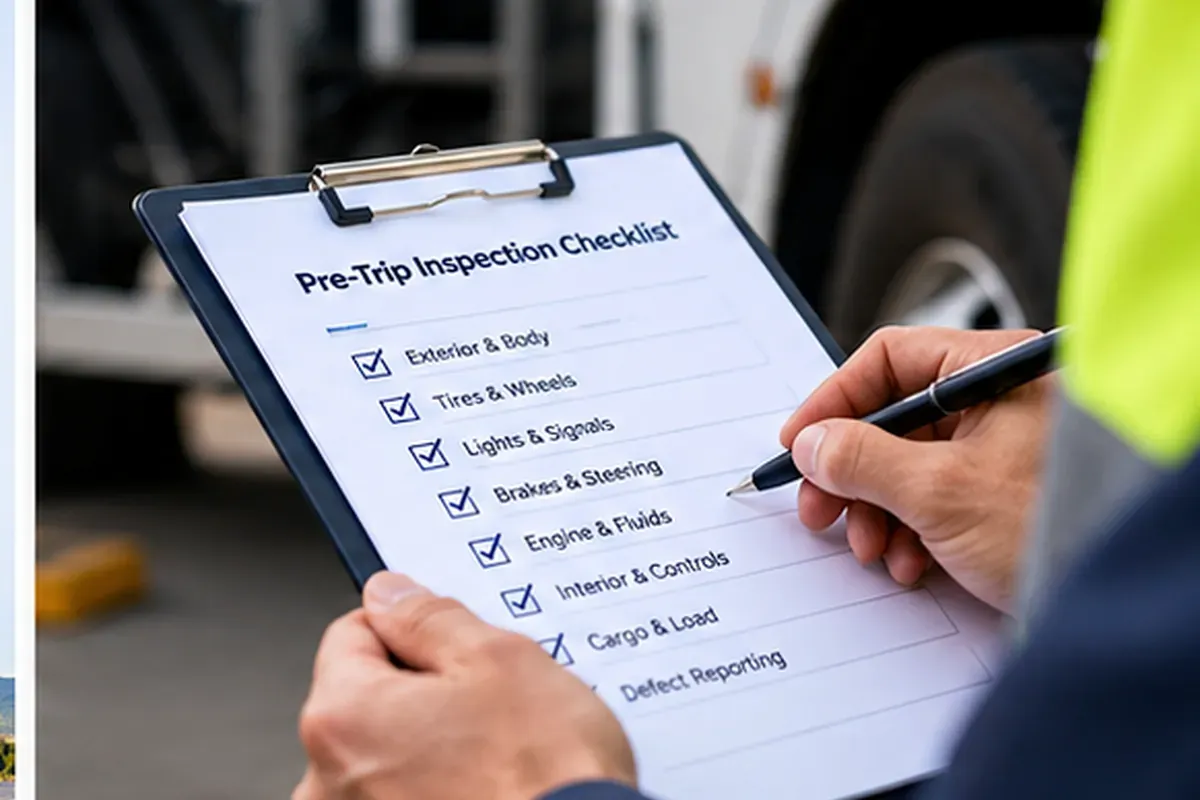
A fleet pre-trip inspection should cover more than just the engine and tires. From exterior damage and tire condition to lights, brakes, safety equipment and cargo, each area can reveal an issue that needs attention before a vehicle leaves the yard. The 10 checks below cover the core areas most fleet teams can include in a daily pre-trip inspection, with specific items adapted to the vehicle type and operating requirements.
1. Exterior and Body Condition
Before entering the driver’s seat, the vehicle should be checked from the outside for fresh damage, loose parts or anything that looks different from its normal condition. This allows the driver to identify visible issues before departure and gives fleet teams a record of the vehicle’s condition.
- Body panels: New dents, scratches, loose or missing parts
- Doors and locks: Open, close, and latch correctly
- License plate: Present, secure, and legible
2. Tires and Wheels
Tire checks are easy to rush when time is short. As of August 2025, FMCSA roadside inspection data ranked tires that were leaking or inflated below 50% of maximum pressure as the fourth most-cited vehicle violation, according to CVSA’s 2025 Roadcheck results. A quick walkaround helps catch visible issues before departure, though it doesn't stand in for a full tire examination where one is called for.
- Tread condition: Even wear, adequate depth
- Cuts and bulges: Sidewall or tread damage
- Tire pressure: Matches the specified level
- Wheels, rims, lug nuts: Damage, missing or loose nuts
- Visible leaks: Fluid near wheels
3. Lights and Signals
Lights and signals need a check before every departure. Working lights keep the vehicle visible and show other road users where it's headed next. The check applies to the vehicle itself and to any trailer or attached equipment.
- Headlights, tail and brake lights: Working, lenses intact
- Turn signals and hazards: Flash correctly
- Reverse lights: Illuminate in reverse
- Marker and clearance lights: Working where fitted
4. Brakes and Steering
Brakes and steering need both a visual check and a basic functional check. Some problems can be seen around the vehicle, but some show up through the driver's controls, such as an unusually soft brake pedal or excessive steering play. Under 49 CFR §392.7, drivers of commercial vehicles must be satisfied that the service brakes, parking brake and steering mechanism are in good working order before driving.
- Service brake: Firm pedal, no unusual travel
- Parking brake: Holds the vehicle
- Brake warning indicators: No active warnings
- Steering response: No excessive play or pull
- Brake-system damage or leaks: Visible damage or fluid
5. Fluids, Engine and Mechanical Components
The next check in a pre-trip vehicle inspection is under the hood and around the areas where mechanical problems are easiest to spot. A low fluid level, a worn hose or a visible leak usually means something needs fixing before the vehicle heads out.
- Engine oil and coolant: correct level
- Brake, washer, power steering fluid: Correct level where applicable
- Belts and hoses: Cracks, fraying, looseness
- Battery: Secure; no corrosion
- Visible fluid leaks: Puddles or drips under the vehicle
For fleet managers, the process should not end when the checklist is submitted. Inspection results should feed into the next step, whether that means escalating a defect, creating a maintenance task, or keeping the vehicle available for operation.
6. Windshield, Mirrors and Wipers
Visibility checks are easy to rush, particularly when a vehicle is leaving on a tight schedule. Cracks, damaged mirrors and worn wipers should be identified before departure. A quick check at this stage can catch these issues early, since each one may reduce visibility.
- Windshield: No significant cracks
- Mirrors: Clean, secure, adjusted
- Wipers and washer: Clear the glass properly
7. Interior and Driver Controls
A driver pre-trip inspection checklist should cover the cab as well as the outside of the vehicle. Once the driver is behind the wheel, what matters most are the controls and systems they depend on while driving, so this part of the check confirms that everything needed for a safe trip is in place and working.
- Seat belt and horn: Working
- Dashboard warning lights and gauges: No active warnings, readings normal
- Defroster: Clears the windshield
- Odometer: Records accurately
8. Safety Equipment
As safety equipment may sit unused for months, it is easy to overlook during routine checks. However, emergency equipment in the vehicle also deserves a routine check, so that drivers know what is available if the vehicle breaks down or an incident occurs on the road.
- Emergency equipment: Present and serviceable, such as triangles, extinguisher, and first-aid kit, as your vehicle type requires
9. Cargo and Load Security
A vehicle can be mechanically sound and still unsafe to operate if its cargo isn't properly secured. Before departure, check the load, restraints and cargo doors so nothing shifts, falls or becomes a hazard in transit.
- Load secured: No shifting, evenly distributed
- Tie-downs: Good condition, properly fastened
- Doors and tailgate: Closed and secure
- Loose Objects: Nothing unsecured in the cargo area or cab
10. Documents and Vehicle Information
The inspection record should capture the basic information needed to identify the vehicle and link the inspection to the right driver, date, and location. Where applicable, the previous inspection report should also be reviewed before the vehicle goes out.
- Unit/vehicle number
- License plate
- Driver name
- Date and time
- Odometer reading
- Inspection location
- Vehicle type
- Previous inspection or outstanding defects
Adapting the List for Trucks and Commercial Vehicles
A truck pre-trip inspection checklist needs a few additional checks because commercial vehicles often have trailers, air brake systems, specialized equipment, or cargo that passenger vehicles do not. The exact items in the checklist might depend on the vehicle configuration and what it carries.
Common commercial vehicle types include tractor-trailers, box trucks, flatbeds, tankers, refrigerated trucks and vehicles with specialized equipment. Each configuration has its own inspection points in addition to the standard pre-trip checks.

The table below highlights the additional checks to consider for each vehicle type.
Some of these checks can be captured using photos and videos, such as visible damage, tire condition, lights, body panels and trailer condition. However, others still need a driver's hands-on inspection, particularly checks involving brakes, coupling systems, controls, or load securement.
For the visual part of the process, truck inspection software can make inspections easier to capture and review. A driver can use a smartphone to capture photos or a walkaround video, while the AI checks the footage for visible damage and other vehicle conditions. The findings can be turned into a consistent inspection report and can be reviewed alongside the driver’s hands-on checks.
For Fleets
Stop costly breakdown-driven decisions
Use AI based vehicle inspections to identify issues early and optimize your fleet lifecycle
How to Perform a Pre-Trip Inspection: Step-by-Step
A good pre-trip inspection follows the same route every time, which makes gaps obvious and the process faster with practice.
- Review previous inspection records. Check the last inspection report and note any unresolved issues before you touch the vehicle.
- Conduct the walkaround. Start at one corner and move around the vehicle in a set direction, looking at body panels, glass, lights, and load. Note any new damage.
- Check critical safety systems. Inspect tires, brakes, steering, lights, fluids and any other component that affects safe operation, including the cab controls.
- Record defects. Write down what you found, where it is, how serious it is, and attach a photo where useful. Record the defect immediately to avoid missing important details.
- Decide whether the vehicle is road-ready. Follow company procedures and any applicable regulations to clear it for use, restrict it, or take it off the road, and pass the issue to the right person.
Pre-Trip Inspection, DVIR and Periodic Inspection: What Is the Difference?
For US fleets, three terms are often mixed up, but they often refer to different parts of the vehicle inspection process. Here’s a glance at what each term means:
Under 49 CFR §396.13, drivers must inspect the vehicle before operating it and be satisfied that it is in safe operating condition. They should also review the previous inspection report when required.
Under §396.11, drivers document defects or deficiencies that would affect safe operation on a DVIR, and the motor carrier must certify repairs, or that the repair is unnecessary, before the vehicle goes back out.
FMCSA published a final rule on electronic DVIRs on February 19, 2026 (effective March 23, 2026), making it explicit that DVIRs can be created and kept electronically. Paper DVIRs remain permitted. Requirements vary by vehicle type, operation and jurisdiction, so confirm what applies to your fleet with your compliance lead.
What to Do When a Defect Is Found
Finding a defect is only the first step. For fleet teams, the key is to document the issue, assign it to the right person, and resolve it before the vehicle returns to service.
- Stop and record it: Note the defect, its location and the vehicle it belongs to.
- Rate the severity: Many fleets use three tiers: Minor, Major, and Safety Critical. This is a company scale, not a regulatory one.
- Add evidence: A photo removes ambiguity and speeds up the repair decision.
- Report it immediately: Report it to the person named in your escalation process. Do not operate the vehicle until it is cleared under your procedures.
- Close the loop. The next driver should see what was found, what was repaired, and who signed it off.
A simple severity scale keeps decisions consistent between drivers. For example:
Pre-Trip Inspection vs. Preventive Maintenance
A pre-trip inspection is a quick daily screen by the driver. Preventive maintenance is scheduled work by technicians, based on mileage, hours or time. They work together: the inspection catches what changes between services, and maintenance addresses wear before it fails.
A failed pre-trip check should create a maintenance action, and recurring defects should shape your preventive maintenance schedule. Tracking a fleet health score helps show which vehicles keep failing and need attention first. If the same vehicle repeatedly reports tire wear or lighting faults, those inspection records can help the maintenance team identify a recurring problem instead of treating each defect as an isolated repair.
Paper vs. Digital Pre-Trip Inspections

Paper checklists can work well for basic inspections, but they get harder to manage as fleets grow across vehicles, drivers and locations. Digital inspections give fleet teams a central record of completed checks, reported defects, photos and vehicle history.
Paper and digital inspections differ most in what happens after the driver finishes. In a digital workflow, a defect is photographed when it's reported, assigned to someone for follow-up and added to that vehicle's inspection history. Managers no longer have to gather paper forms by hand to see where things stand, because inspection status and recurring issues show up across vehicles and locations in one place. If you’re comparing tools, our overview of the best vehicle inspection solutions for fleets is a useful starting point.
How AI Fits Into the Fleet Inspection Workflow
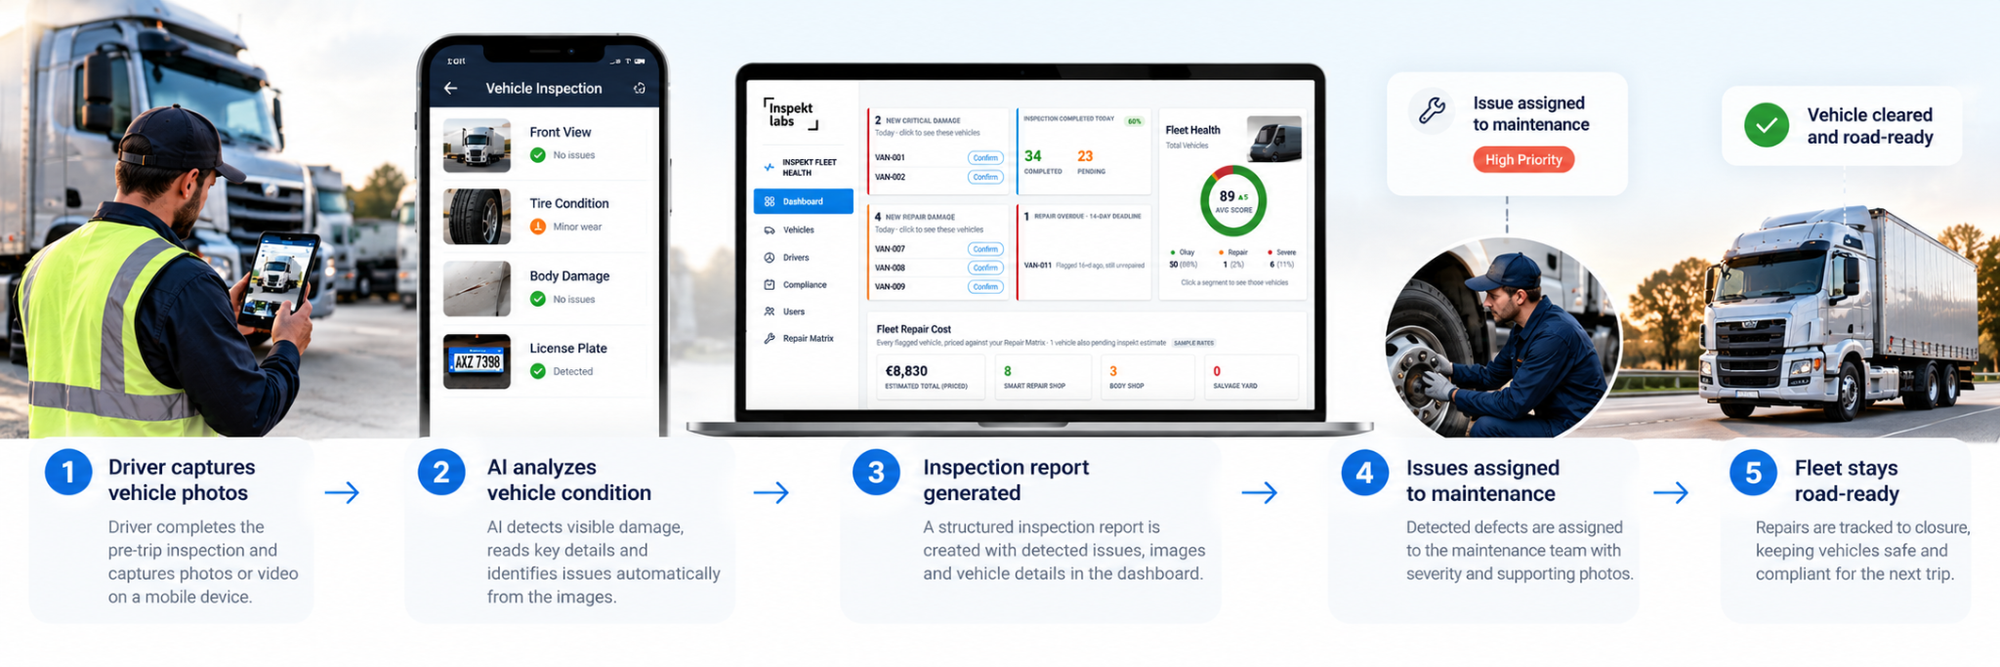
A vehicle inspection tool can automate part of the visual inspection workflow. A driver can capture photos or a walkaround video, while the software analyzes the images for visible damage and records the findings in a standardized inspection report. In practice, that means:
- Photo-based vehicle damage detection and documentation
- Consistent inspection records, whoever does the walkaround
- Faster identification of visible damage
- Readings such as license plate, VIN and odometer captured from images
- Centralized, historical vehicle-condition tracking for fleet managers
- Inspection findings passed into maintenance workflows
For fleet managers, the value of the inspection tool isn't just faster image analysis. It is the ability to turn individual inspection photos and videos into structured vehicle-condition data that can be reviewed over time.
Here is how the work divides between the driver and the software:
There are also clear limits to what AI can assess from images or video. It cannot test a brake pedal, check steering play or verify fluid levels, so these parts of the inspection still require a physical check.
Common Pre-Trip Inspection Mistakes
Most weak inspections trace back to a handful of habits. Watch for these:
- Treating it as a checkbox exercise. Ticking every box in under a minute is a warning sign.
- Using one checklist for every vehicle type. Vans, trucks and trailers need different items.
- Skipping the previous report. Unresolved defects get ignored and repeat.
- Not documenting visible damage. Disputes over who caused it follow.
- Skipping tire checks. Tires are a leading violation category.
- Ignoring warning lights. An active indicator is a defect until proven otherwise.
- Reporting defects late. Delays turn small repairs into breakdowns.
- Not tracking recurring defects. Repeated issues across the same vehicle, driver or location can reveal maintenance or process problems that are easy to miss when inspections remain on paper.
- Relying on outdated paper forms and never linking findings to maintenance.
How Fleet Managers Can Improve Inspection Compliance
For fleet managers, compliance is not just about finishing a checklist. The process also has to make it easy to report defects, assign follow-up actions, and confirm that issues have been resolved.
A checklist that is too long, unclear, or cut off from maintenance can quickly become a box-ticking exercise. Fleet managers can improve compliance by standardizing the process, making inspections easier to finish, and using the inspection data to follow up on defects.
- Standardize the process. Build one checklist per vehicle category.
- Make it easy to complete. Remove fields nobody uses.
- Add photo evidence for visible damage and defects.
- Define escalation. Every driver should know who receives a failed inspection.
- Connect inspections to maintenance so a failed check triggers a work order.
- Monitor recurring defects across vehicles, drivers and locations to identify maintenance patterns and operational gaps.
- Review inspection data regularly to identify maintenance trends, recurring defects and areas where driver training may be needed.
Training is part of compliance. Show new drivers what a real defect looks like, walk through one vehicle together and explain why each zone is on the list. Drivers who understand the reason behind a check are less likely to rush it. Our fleet management guide covers how inspection data can automate the workflow of the fleet inspections.
For Fleet Leaders
Scale smarter fleet decisions with AI insights
Analyze vehicle condition across your entire fleet, identify patterns, and optimize maintenance, procurement, and lifecycle planning.
Key Takeaways
- A pre-trip inspection checklist standardizes vehicle checks and gives fleet managers a consistent record of inspection results.
- Tires, brakes, lights and cargo are key inspection areas that should be checked consistently and documented when defects are found.
- The checklist is the process; the DVIR is the report; periodic inspection is a separate formal inspection process that should be done at least once every 12 months.
- Photos and AI support the visual checks. Brakes, steering and fluids stay hands-on.
- Every defect needs a severity, an owner and a clearance decision.
Frequently Asked Questions
What is a pre-trip inspection checklist?
A pre-trip inspection checklist is a structured list drivers use to check a vehicle before operation. It covers tires, brakes, lights, fluids, cab controls, and cargo to confirm the vehicle is safe to drive.
What should be included in a fleet pre-trip inspection checklist?
A fleet pre-trip inspection checklist should cover exterior condition, tires, lights, brakes and steering, fluids, glass, cab controls, safety equipment, cargo security and defect documentation. Add vehicle-specific items for trucks and trailers, and tailor the list to each vehicle category so drivers are not ticking boxes that don't apply to them.
What should fleet managers look for in digital fleet inspection software?
Fleet managers should look for configurable checklists, photo and video capture, defect tracking, centralized inspection records, maintenance workflow integration and vehicle-condition history.
How often should fleet vehicles undergo a pre-trip inspection?
Fleet vehicles should be inspected before operation, according to applicable regulations and company procedures, typically before each trip or shift. Separately, applicable commercial vehicles need a periodic inspection at least every 12 months. Under 49 CFR §396.13, drivers of regulated vehicles must be satisfied that the vehicle is safe before driving.
What should a driver do if they find a defect?
Stop, record the defect, its location and severity, attach a photo where useful, and report it to the designated contact. Do not operate the vehicle until it is cleared under company procedures.
How long does a pre-trip inspection take?
The time varies by vehicle type, inspection requirements and fleet procedures. A tractor-trailer will generally require more checks than a passenger vehicle or van.
Is a pre-trip inspection the same as a DVIR?
No. A pre-trip inspection is the check the driver performs; a DVIR is the report documenting defects or deficiencies, with repairs certified before the vehicle returns to service.
Can fleet pre-trip inspections be completed digitally?
Yes. Many fleets now run inspections through mobile apps, and FMCSA's 2026 final rule backs that up: DVIRs can be created and maintained electronically. Paper is still permitted. Either way, check what applies to your operation.
Can AI be used for vehicle inspections?
Yes, AI can take on the visual part of the inspection, flagging visible damage and recording vehicle condition from photos or video. The hands-on checks stay with the driver: brakes, steering and fluids. AI supports the physical inspection; it does not replace it.